Linux Machine Installation
This article provides a step-by-step guide to deploying the Platform on a Linux machine, using Apache Tomcat as Web Server and Servlet Container. We will go through the procedure for a local machine, as well as a machine running in the Amazon Web Services (AWS) Cloud. This article complements the more general installation guidelines, and provides the specific parameterizations needed for installation on Linux.
Prerequisites
- WAR file
- Configuration files (
conf.properties,content.properties,hazelcast.xml,jaas.conf) - NmLoginService Extension (
NmLoginServiceAdapter.jar) - The InstallLinuxAppwayConfFiles (ZIP file) provided with this guide, containing all the configuration files needed
- A valid license
- Apache Tomcat
- Apache Tomcat configuration files (
setenv.sh,server.xml) - The JAAS login module for Tomcat (
NmJAASLoginModules.jar) - The required version of the Java Development Kit (JDK)
Optional
- An AWS account (if using a machine hosted by Amazon Web Services)
This article is based on the example of a deployment of Appway 6.3.19 on Linux using Tomcat 7 and Java 8 (Oracle JDK version 1.8.x). The guide can be adapted to all versions of the Platform, Java, and Apache Tomcat. Remember to pay attention to compatibility, especially considering that subsequent FNZ Studio releases run on different versions of Java (see Java Support Roadmap).
Step 0: Setting up a Linux Machine on Amazon Web Services (skip if you use a local machine)
Log in to your Amazon Web Services account > Elastic Compute Cloud (EC2)
Launch a new instance, using the Amazon Linux AMI. Select the proper instance type, as shown in Figure 1 and Figure 2. We recommend using a machine with at least 2 vCPUs and 4 GB of memory. Confirm the settings and create the instance.

Figure 1: Selecting an AMI

Figure 2: Selecting an Instance Type
To make our Platform instance accessible, edit the associated Security Group to allow Inbound traffic on Port 8080 from anywhere, as shown in Figure 3.
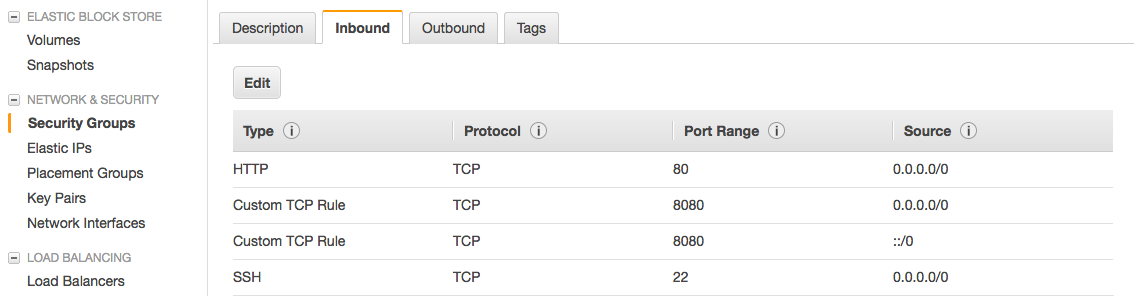
Figure 3: Setting the Security Group to Allow Inbound Traffic on Port 8080
You can set up Tomcat so as to make the Platform available on port 80, the default HTTP port. To do that, allow all Inbound traffic on Port 80, and edit the configuration files server.xml and jaas.conf, substituting the occurrences of :8080 with :80.
Start your machine from the Instances area in the Administration panel, as shown in Figure 4. You need to set up and download the keys needed to connect to the machine, and check that you're able to connect to the machine via ssh.
You can connect using something in the lines of:
ssh -i "appway_ec2.pem" ec2-user@ec2-0-0-0-0.compute-1.amazonaws.com
You can get more information on how to connect by selecting your Instance, and clicking on the Connect button.
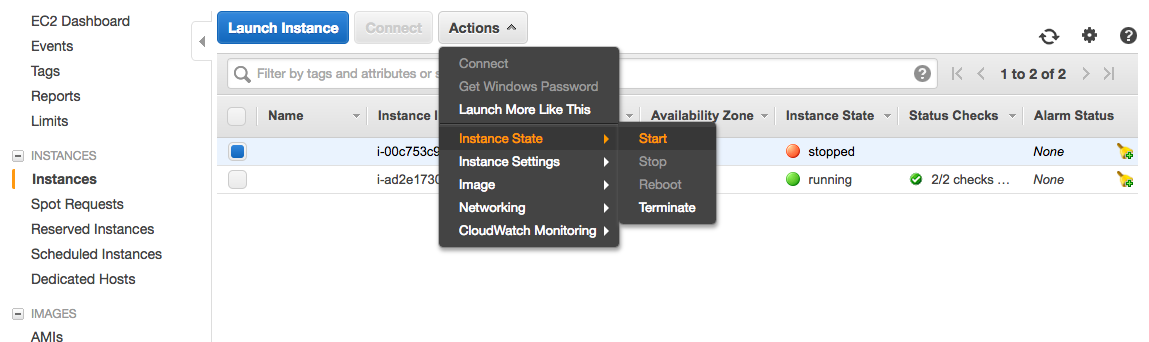
Figure 4: Starting the Instance
ssh.Step 1: Setting up Java
If not already done, set up the proper version of the Java Development Kit, and configure the JAVA_HOME environment variable.
- In the Linux shell, check that Java is installed by running the command:
java –version - Check that the JAVA_HOME environment variable is correctly set up by running the command:
echo $JAVA_HOME
If Java is not installed, or is not the correct version, go to the Oracle Download Area, download the latest version for your machine, and install it.
Step 2: Copy the Required Files to the Machine
Copy all the files needed to deploy the Platform instance (see prerequisites at the start of this article), including Apache Tomcat, configuration files, and libraries, to the target machine.
Create the archive AppwayOnLinux.zip with all the files listed in the prerequisites section.
If needed, you can use the scp command to copy the files from your local machine to the Linux server. The ssh authentication method can change based on the settings of your machine. In my case, I used key-based authentication to connect to the machine:
scp -i "appway_ec2.pem" /Users/testuser/Desktop/AppwayOnLinux.zip ec2-user@ec2-0-0-0-0.compute-1.amazonaws.com:/home/ec2-user
Specify your own key in place of appway_ac2.pem, and the address of your own machine in place of the one specified above (ec2-0-0-0-0…).
Step 3: Set up the Directory Structure
Create the following directory structure on the Linux machine:
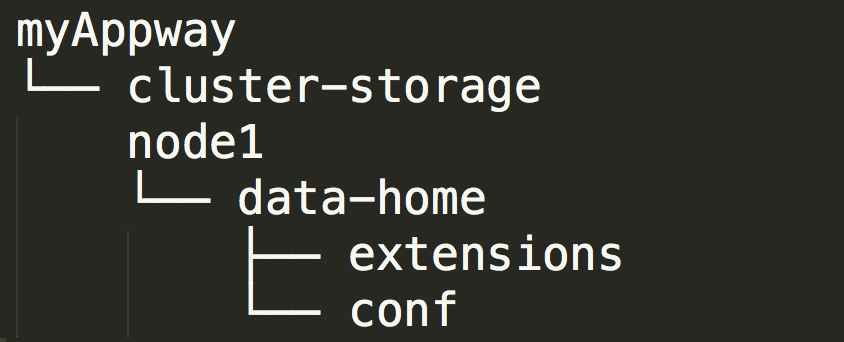
cd /home/ec2-user/mkdir myAppwaycd myAppway/mkdir node1mkdir cluster-storagecd node1/mkdir data-homecd data-homemkdir extensionsmkdir conf
Step 4: Setting Up Apache Tomcat
-
Unzip the Apache Tomcat .zip file that you copied on the machine, and move the main directory under
node1, renaming it totomcat:unzip apache-tomcat-7.zipmv apache-tomcat-7.x.x.xx tomcatmv tomcat ../myAppway/node1/ -
Move the
setenv.shfile to the tomcat bin folder:mv setenv.sh ../myAppway/node1/tomcat/bin/ -
Edit the
setenv.shfile to set the correctJAVA_HOMEvariable:nano ../myAppway/node1/tomcat/bin/setenv.sh -
Edit the file to set the proper path for the
JAVA_HOMEenvironment variable, then save and close.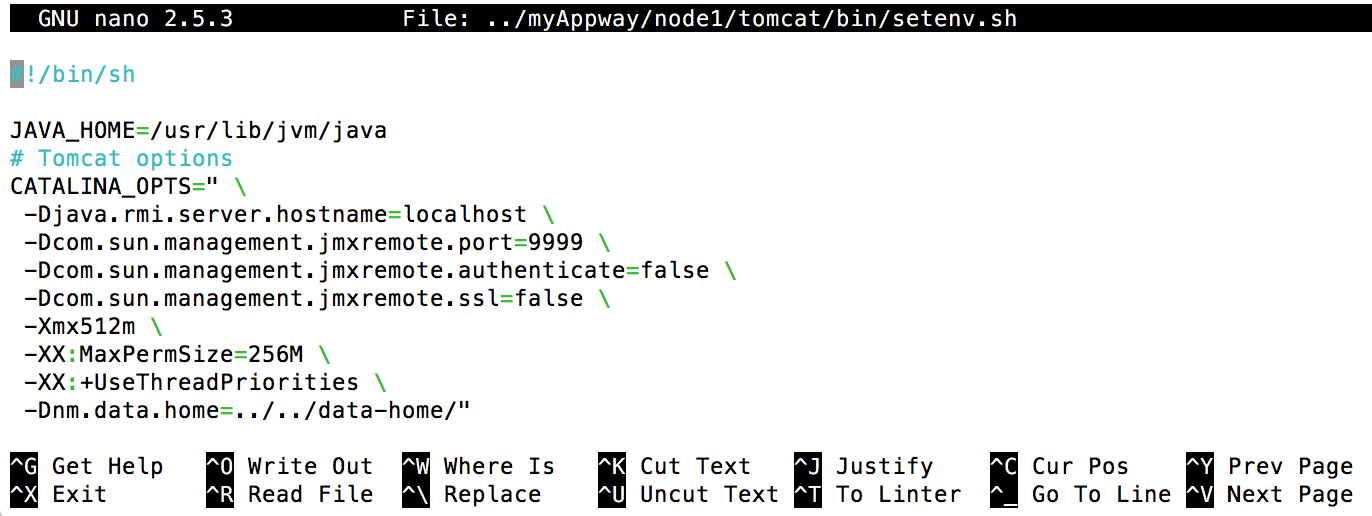
-
Make all the Tomcat binary files executable:
cd ../myAppway/node1/tomcat/bin/chmod +x *.sh -
Run Apache Tomcat and (optional) tail the log file:
./startup.shtail ../logs/catalina.out
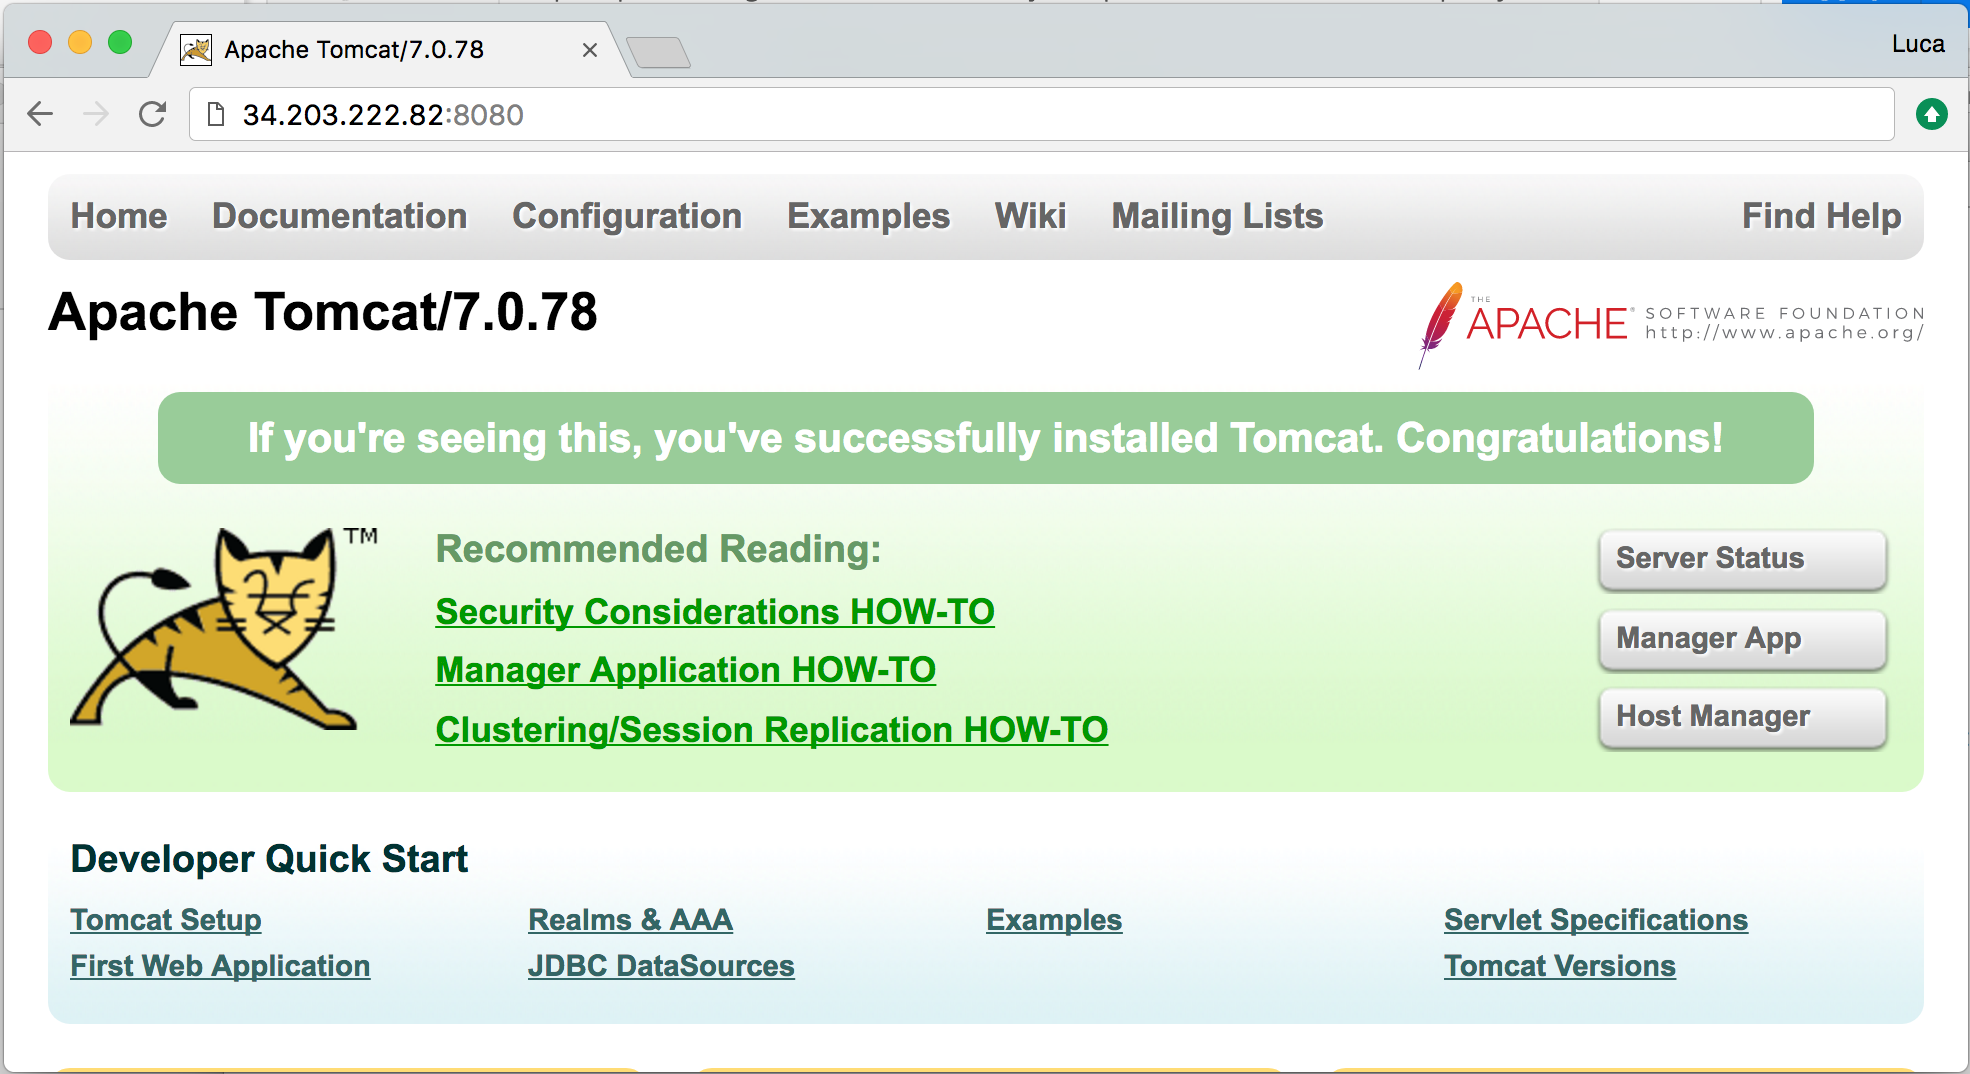
Connect to your machine on port 8080, and if everything is set up correctly, you should see Tomcat’s splash screen:
To continue setting up your machine, you need to shut down Apache Tomcat: ./shutdown.sh
Step 5: Setting Up the Platform
-
Copy the
.warfile, and remove the tomcat ROOT webapp. Make FNZ Studio the root web app by renaming theappway.warfileROOT.war:mv nm-6.3.20-patched.war ../myAppway/tomcat/webapps/ROOT.warcd ../myAppway/node1/tomcat/webapps/rm –r ROOT -
Move the login module to the Tomcat lib folder:
cd /home/ec2-user/AppwayOnLinuxmv NmJAASLoginModules.jar ../myAppway/tomcat/lib/ -
Move the Login Service Extension to the proper folder:
mv NmLoginServiceAdapter.jar ../myAppway/node1/data-home/extensions/ -
Move the Login Service Extension configuration file to the proper folder:
mv NmLoginServiceAdapter.jar.cfg ../myAppway/node1/data-home/extensions/ -
Move the configuration files to the conf folder:
mv hazelcast.xml ../myAppway/node1/data-home/conf/mv jaas.conf ../myAppway/node1/data-home/conf/mv conf.properties ../myAppway/node1/data-home/conf/mv content.properties ../myAppway/node1/data-home/conf/mv license.properties ../myAppway/node1/data-home/conf/ -
Run Apache Tomcat and (optional) tail the log file:
cd ../myAppway/node1/tomcat/bin./startup.shtail ../logs/catalina.out
Step 6: Confirm Access to FNZ Studio Composition
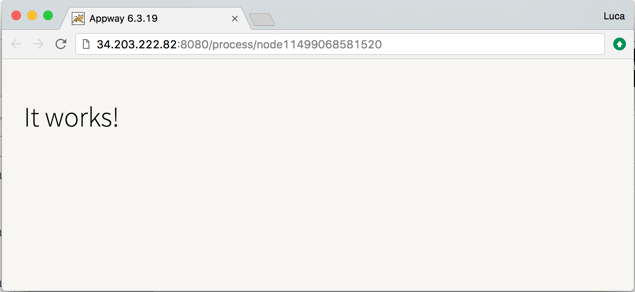
Go back to your browser and navigate to the public IP address of your machine, on port 8080. If everything is working correctly, you should see the following message:
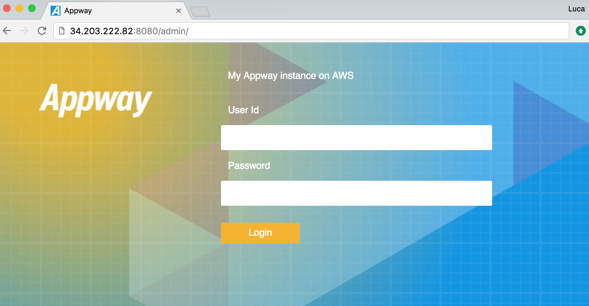
Navigate to {BASE_URL}/admin, where {BASE_URL} is port 8080 of the public IP of your machine, e.g. http://34.203.222.82:8080/admin/
You should see the FNZ Studio Composition login page: