Emailer Design
If you do not want to use any external email marketing and automation services for sending out emailers from our Platform environment, you can design an emailer using Screens and its components.
There is a wide range of desktop as well as mobile email clients/applications. All of them use a different rendering engine, therefore, they support a different subset of HTML and CSS. This means that the rendering of an emailer on a browser-based webmail could differ from a desktop email application. For this reason, it is essential to know in-hand which of the Screen Components support such cases and are useful in designing emailers.
Step 1: Know which Screen Components to use
First things first, only HTML tables (<table><tr><td>) allow you to control the design layout for emailers. Divs, Layout Containers, and Adaptive Flow Layouts are of no use. However, the Info Table Screen Component is to the rescue. This component is flexible enough to achieve your design layout. Therefore, start your design by building blocks using the Info Table.
Following is a list of Screen Components that you can then add in:
- All Headings (H1, H2, H3, H4, H5, H6) - They render as HTML heading tags (
<h1><h2><h3><h4><h5><h6>). They help render the browser fallback styles even if you don't apply any inline styles (see Step2: Style Screen Components with inline CSS). - Paragraph - It renders as an HTML paragraph
<p>tag. - Text - It renders as an HTML
<span>tag. - Link - It renders as an HTML anchor link
<a>tag. - Image - It renders as an HTML
<img>tag. When using the Image component, select URL as a Type property and enter the absolute URL of the Resource in the URL field (e.g.https://xyz.appway.com/resource/object/xyz/LatestCommittedFilter/feedback.png).
Avoid selecting Resource as a Type (and the actual resource from the Business Object selector). Such Image resources are not rendered in the email clients since the hosting path is not reached.

- HTML Head Style - You can declare the font families by using the HTML Head Style component. Please, refer to this recipe to know more about how to declare custom fonts in CSS file. The font family should be declared on the component itself explicitly by using inline CSS (see Step2: Style Screen Components with inline CSS). However, this procedure comes in handy when you create a variable for the custom font and use the variable in the inline CSS, so that you can switch to the newer font by changing it only once.
Step 2: Style Screen Components with inline CSS
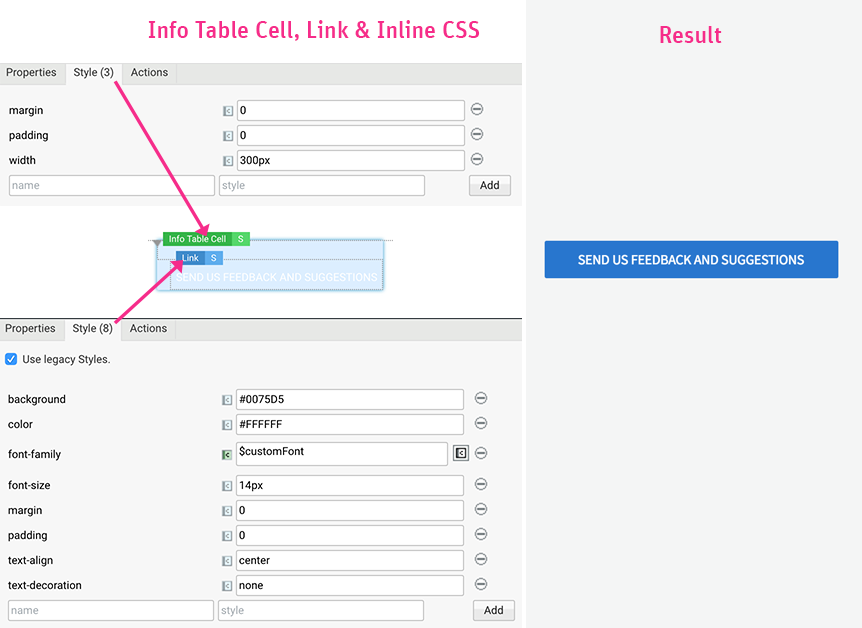
You can add inline CSS styles by enabling Legacy Styles on the Screen Component editor (Style tab). Remember that email clients ignore CSS properties that are not inline, namely, the properties applied via Style Business Objects, the properties applied via a Stylesheet used as a Resource, and even the default Workspace CSS that comes from the Platform. Therefore, achieving the design of your choice requires considerable effort in adding a decent amount of inline CSS styles one by one to each of the components. It is important to know whether the most common CSS properties are supported amongst various email clients. Take a look at this list of selectors and properties and apply them carefully. For example, the 'margin' property is not supported at all in Outlook.com.
Here is an example of a button that looks like a button in the Design System and which has been created by using Info Table Cell, Link and inline CSS styles:
Step 3: Test it in real-time using email clients
Don't rely only on the Preview tab of the Screen Editor or the Workspace preview. Always test your final design in real-time in the email clients by configuring outgoing emails using the Mail Extension. Make sure your design preview looks as expected in those email clients.
Along with the design of the emailer, you could configure also the subject and sender's details. They are one of the first things users see before accessing the email. You can configure them from the properties of the Send Mail Task used in your process.
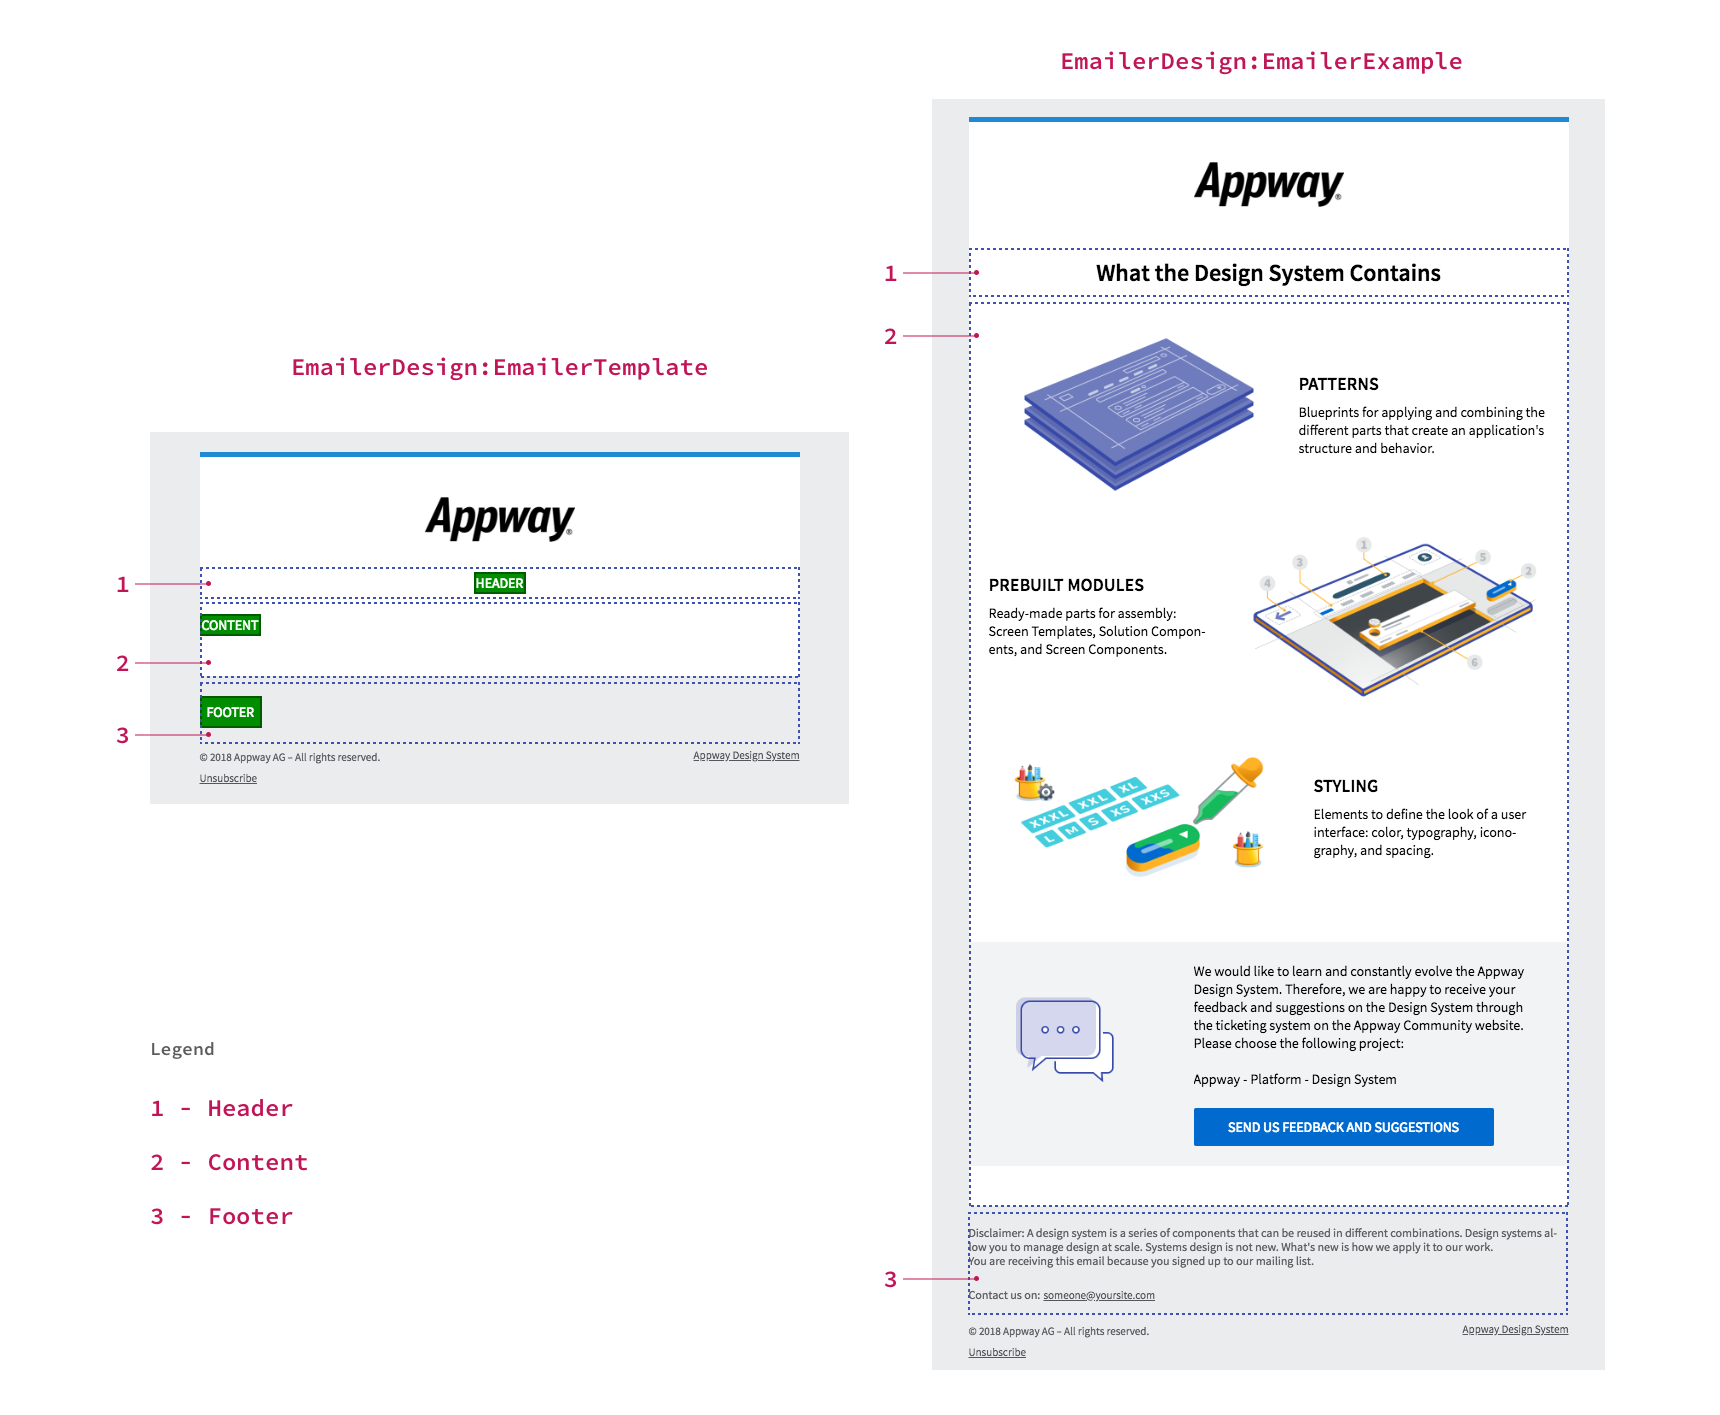
Example Package
FNZ Studio provides a Package containing an emailer template along with an example to speed up your work, so that you don't need to start designing from scratch. Download the following Package and import it into your environment: Download EmailerDesign.awdeployment
In this Package, you can find:
- Two Screens:
EmailerDesign:EmailerTemplateandEmailerDesign:EmailerExample - A Process:
EmailerDesign:SendEmailer
The Screens are used to template the email. There are three main areas of an Emailer, namely, Header, Content, and Footer.
- Recycle the design elements that are ready-to-use from the example Screen
You can duplicate the
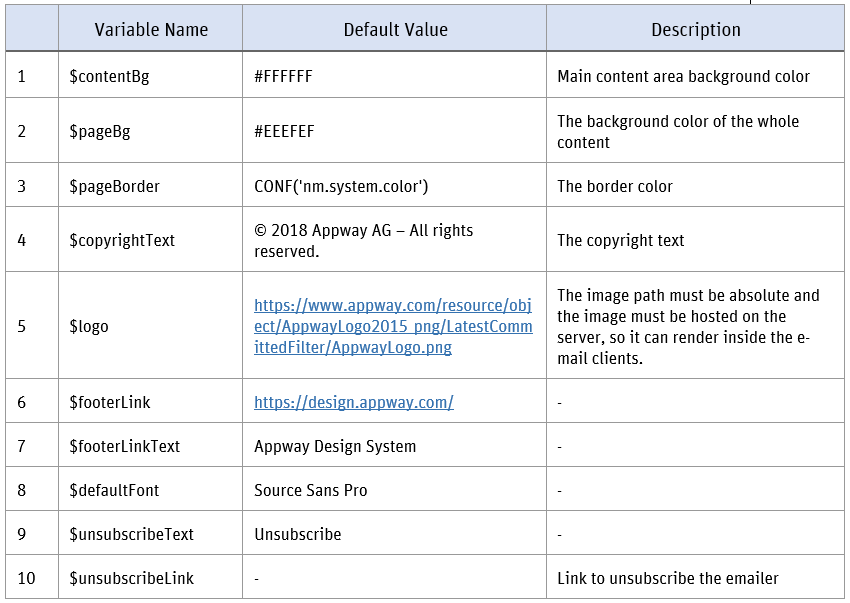
EmailerDesign:EmailerExampleScreen and start customizing the existing design based on your requirements. That way you don't need to write the inline Styles that are already there. In theEmailerDesign:EmailerTemplateScreen, there are following Variable Assignments which come handy during the customization.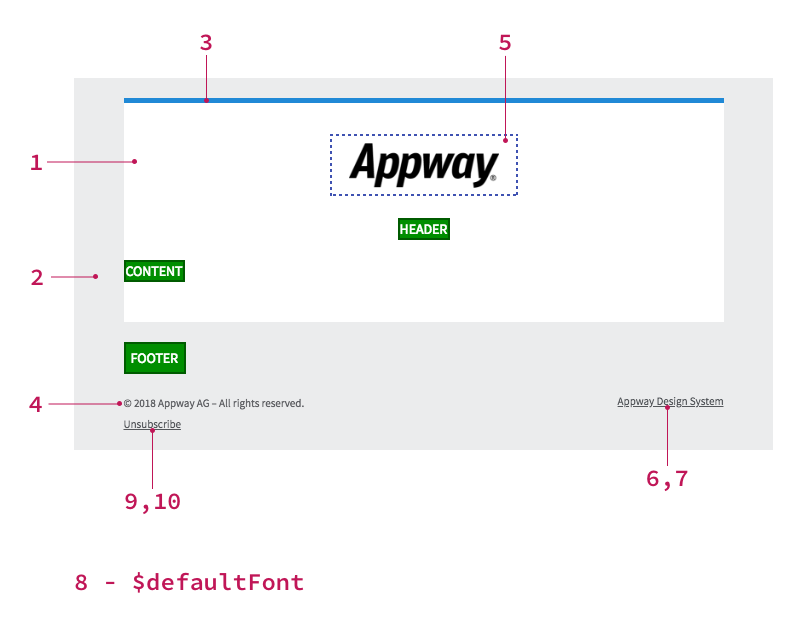
- Test your Emailer
The
EmailerDesign:SendEmailerProcess provides two local variables,emailToandemailFrom. These can be set with a valid email address. When the Process is run, an email is sent according to the configuration using theEmailerDesign:EmailerExampleScreen as a template. As mentioned above, you need to configure outgoing emails using the MailExtension in your environment to start testing.