Users, Gruops and Roles
Introduction
Users, Groups, and Roles allow you to assign different tasks to each participant according to their responsibilities. These participant categories play an important role e.g. when defining Swimlane Participants in your Process, Entry Points, or WebAPI Access Control.
As an example, you can have the following participant categories:
- User: John Smith
- Group: Zurich Office
- Role: Front Office
Users, Groups, and Roles may be defined and monitored in FNZ Studio Composition under System Configuration > Users/Groups/Roles.
Users
Creating Users
Although users are usually imported from an external management system, new Users can also be created in FNZ Studio Composition when needed.

If you have a Users/Groups/Roles Permission, follow these steps to create a new User:
-
Go to System Configuration > Users/Groups/Roles.
-
Click on the Users tab. A list of the existing users in the system is displayed.
-
Click on the menu icon on the left, and click on the New User button.
-
In the dialog box, fill in at least the User Id and Password fields.
-
Select the access the User is granted by checking one or both Roles checkboxes (see Roles section below):
-
Administrator - The Administrator Role has full access to all Appway Studio/FNZ Studio Composition functionalities, both related to the Core Platform and Extensions. In this case, the Access column will display the value Studio. Note that the Role name can be changed through the configuration property
nm.auth.roles.administrator. However, this change must be performed at the first instance startup; any subsequent change is not possible. -
User - The User Role has access to Appway Workspace/FNZ Studio Runtime. In this case, the Access column will display the value Workspace. Note that the Role name can be changed through the configuration property
nm.auth.roles.user. However, this change must be performed at the first instance startup; any subsequent change is not possible.These Roles are also related to Studio Permissions, see details in our documentation.
-
-
If you need to change the user settings at a later stage, right-click on the user row, and then click on the Edit button.
Groups
A Group is a collection of Users with common characteristics. For example, Group ZurichOffice may be a collection of all the Users located in the same workplace.
Groups can be used to implement Access Control for a defined cluster of Users who can be set e.g.:
- As Swimlane Participants (only Users within the defined Group will access the tasks in the related Swimlane in a Process or App Task).
- In WebAPIs
- In Entry Points
- In Package Permissions
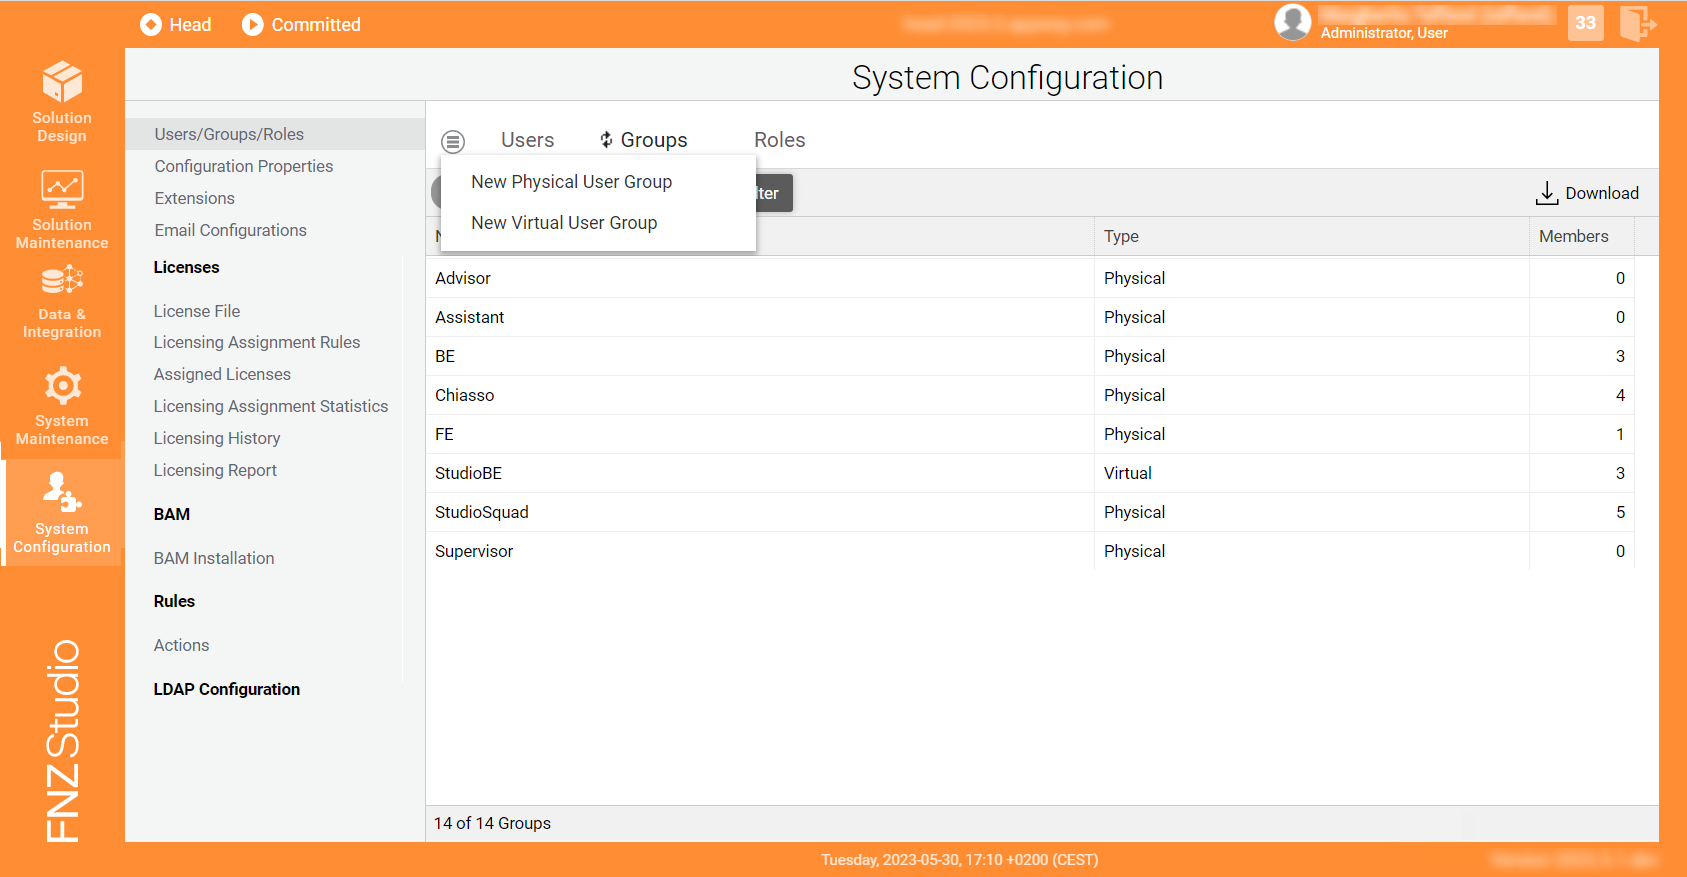
There are three different types of Groups:
- Physical Groups are created by explicitly adding existing Users to the Group itself. Examples of Physical Groups may be
Compliance AdvisorsorLondon Office Employees. See details on creating Physical Groups below. - Virtual Groups are defined based on logical operations applied to Physical Groups. An example of a Virtual Group may be the intersection between two Physical Groups, e.g.,
Compliance AdvisorsandLondon Office Employees. In this case, the Virtual GroupGROUP:ComplianceAdvisorsLondonwould gather all the Compliance Advisors based in London, and may be defined with the logical operation(GROUP:ComplianceAdvisors|GROUP:LondonOfficeEmployees). Virtual Groups are as performant as Physical Groups, but with the additional advantage of being kept up to date by the system with no need of manual re-sync. Therefore, we highly suggest that you create Virtual Groups whenever possible. Note that Virtual Groups can be created empty. See details on creating Virtual Groups below. - Physical (Dynamic) Groups (filtered out by default) are related to a legacy collaboration approach in the Data Logic Business Object. These groups were named according to the syntax:
DataTask_TokenID. The pattern for such groups is configured by editing configuration propertynm.auth.groups.dynamic.patterns(System Configuration > Configuration Properties).
Creating Physical Groups
Physical Groups are created by explicitly adding existing Users to the Group itself. Examples of Physical Groups may be Compliance Advisors or London Office Employees.
If you have a Users/Groups/Roles Advanced Permission, follow these steps to create a new Group and assign it to existing Users:
- Go to System Configuration > Users/Groups/Roles.
- Click on the Groups tab. A list of the existing groups in the system is displayed.
- Click on the menu icon on the left, and then click on the New Physical User Group button.
- In the modal window, enter a Name for the Physical Group. You can:
- Click on Create and close to create an empty Group.
- Click on Create and continue to edit to create a Group and immediately add Users to it. In this case, choose the Users from the modal window.
- If you need to change the User settings at a later stage, right-click on the Group, and then click on the Edit Members button.
- The following option are available through the context menu:
- Edit Members displays the Users included in the Group and allows adding or removing Users.
- Dependencies displays the Group dependencies (e.g., the Group is used in a Process Business Object).
- Delete removes the Virtual Group and its definition. Before deletion is executed, the system warns about any existing dependencies.
Creating Virtual Groups
Virtual Groups are defined based on logical operations applied to Physical Groups. Virtual Group GROUP:ComplianceAdvisorsLondon may be the intersection between two Physical Groups, e.g., Compliance Advisors and London Office Employees. We highly recommend that you create Virtual Groups whenever possible as they ensure equal performance and, moreover, are automatically synced by the system.
If you have a Users/Groups/Roles Advanced Permission, follow these steps to create a new Group and assign it to existing Users:
- Go to System Configuration > Users/Groups/Roles.
- Click on the Groups tab. A list of the existing Groups in the system is displayed.
- Click on the menu icon on the left, and then click on the New Virtual User Group button.
- In the modal window, enter a Name for the Virtual Group.
- In the Definition field, enter the string that defines the Virtual Group based on existing Physical Groups. See details in the section below.
- The following option are available through the context menu:
- Edit Definition allows modifying the Group definition string.
- Show Members displays the Users included in the Group. Note that a Virtual Group can also be empty.
- Dependencies displays the Physical Groups the Virtual Group is based on.
- Delete removes the Virtual Group and its definition. Before deletion is executed, the system warns about any existing dependencies (e.g., the Group is used in a Process Business Object).
Virtual Group Definition
Consider the following information in the definition of Virtual Groups:
- In the Definition field, Physical Groups must be prefixed with
GROUP:, e.g.,GROUP:Developers. - The following operations are supported:
- INTERSECTION (
|): The Users in the new Virtual Group must be included in both Physical Groups. As an example, a group of Developers in the Zurich office may be the intersection between all Developers in the organization and all Zurich office employees.EXAMPLE: Name: GROUP:DevelopersZurich; Definition: GROUP:Developers|GROUP:ZurichOffice
- UNION (
+): The Users in the new Virtual Group are included in any of the Physical Groups. As an example, a group of Switzerland Employees may be the union between Geneva office employees and Zurich office employees.EXAMPLE: Name: GROUP:SwitzerlandOffice; Definition: GROUP:ZurichOffice+GROUP:GenevaOffice
- DIFFERENCE (
-): The Users in the new Virtual Group are the result of the substraction of two Physical Groups. As an example, a group of Geneva office employees may be the substraction of Zurich office employees from all Switzerland Employees.EXAMPLE: Name: GROUP:GenevaOffice; Definition: GROUP:SwitzerlandOffice-GROUP:ZurichOffice
- INTERSECTION (
- The following characters and punctuation marks are allowed:
[a-zA-z0-9_]. Note that all other characters must be enclosed in single or double quotes.EXAMPLE: GROUP:ManagerTeam
- Backslash (to escape Group names in case of white spaces or special characters)
EXAMPLE: GROUP:"Manager's Team" or GROUP:'Manager\'s Team'
- Parentheses (to set operator precedence)
EXAMPLE: GROUP:ZurichOffice|(GROUP:Developers+GROUP:QA)
- Instant validation is in place to ensure:
The Virtual Group name is unique
Only existing Physical Groups are used in the Virtual Group definition
Definition is not empty or too long (> 200 characters) and its syntax is correct
Note that, if a Virtual Group becomes invalid at some point for any reason (e.g., a related Physical Group is deleted), a red error icon will be displayed next to the Group name on the Groups table.
Changes in Extensions Managing Groups
Certain Extensions allow adding or removing Users to Groups. With the introduction of Virtual Groups in FNZ Studio 2023 and the distinction between Virtual and Physical Groups, certain changes in Extension behavior should be considered. However, it may be the case that a User is added to a Virtual Group (instead of a Physical Group). In this case, the User is not added to the Group and the following situations take place:
Functions Extension
- If a User is erroneously added to a Virtual Group instead of a Physical Group (
Functions.UserAddToGroup), the User is not added to the Group and an error is returned stating that the group is a Virtual Group.
Deployment Extension
- If a User is erroneously added to a Virtual Group instead of a Physical Group (
DeploymentExtension.ImportUsers), the User is not added to the Group and a message is returned stating that the user(s) cannot be added to the Virtual Group.
LdapSyncAdapter Extension
- If a User is erroneously added to a Virtual Group instead of a Physical Group, the User is not added to the Group and an error is logged stating that the user(s) cannot be added to to the Virtual Group.
- By default, a Group is not deleted even if all users in a Group are removed from the Group itself (unless stated otherwise, e.g., by a Script Function. This represents a change compared to previous FNZ Studio versions. If necessary, you can enforce the previous behavior by setting the configuration property (System Configuration > Configuration Properties)
sync.autoDeleteEmptyGroupstotrue(default isfalse).
AWSCognitoSync Extension
- If a User is erroneously added to a Virtual Group instead of a Physical Group, the User is not added to the Group and an error is logged stating that the user(s) cannot be added to to the Virtual Group.
- By default, a Group is not deleted even if all users in a Group are removed from the Group itself (unless stated otherwise, e.g., by a Script Function. This represents a change compared to previous FNZ Studio versions. If necessary, you can enforce the previous behavior by setting the configuration property (System Configuration > Configuration Properties)
sync.autoDeleteEmptyGroupstotrue(default isfalse).
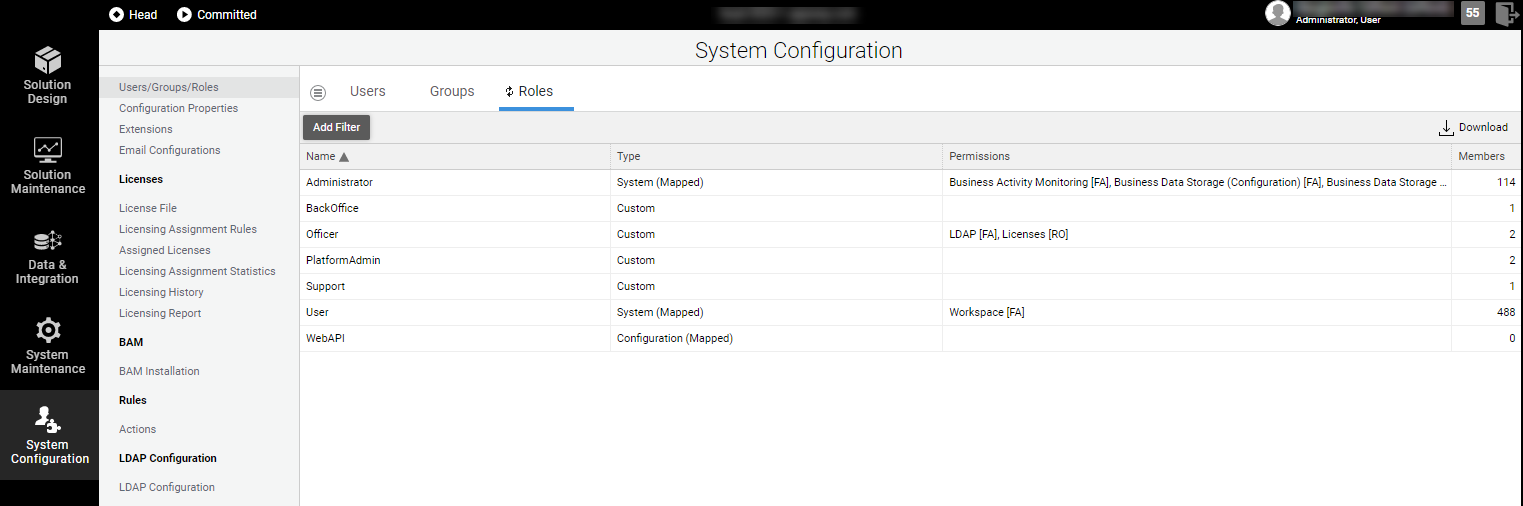
Roles
A Role is an area that can be managed by certain Users, e.g., you can assign the Front Office Role to Users who are in charge of dealing with customers in a business, or the Label Manager Role to Users who are allowed to translate labels in FNZ Studio Runtime.
There are three different types of Roles:
- Custom Roles are manually created by FNZ Studio Composition Users who have the permission to do so (see procedure below).
- Configuration Roles are Roles that are considered as existing, even if there is no User with membership in them. Such Roles are always visible in the Platform, even if the last user has been removed from them. They are configured by editing the
nm.auth.roles.additionalconfiguration property (System Configuration > Configuration Properties). This property is also useful to deploy Solution-specific Roles. - System Roles are Roles automatically created by the system:
- Administrator - The Administrator Role has full access to all FNZ Studio Composition functionalities, both related to the Core Platform and Extensions.
- User - The User Role has access to FNZ Studio Runtime.
- The User can now be set, e.g., as a Swimlane Participant, thus allowing only this User to access the tasks in the respective Swimlane in a Process or App Task.
Creating Roles
If you have a Users/Groups/Roles Advanced Permission, follow these steps to create a new Role and assign it to existing Users:
-
Go to System Configuration > Users/Groups/Roles.
-
Click on the Roles tab. A list of the existing roles in the system is displayed.
-
Click on the menu icon and select the New User Role button. The New Role dialog is displayed.
-
Enter the desired name for your custom Role.
Note: Consider that the Role name cannot be changed after it has been created.
-
If you need to change the User settings at a later stage, right-click on the role row and then click on the Members button.
-
The Role can now be set, e.g., as a Swimlane Participant, thus allowing only users with this Role to access the tasks in the respective Swimlane in a Process or App Task.
Assigning Permissions to Roles
Each Role should be allowed to view and/or edit specific modules or sub-modules in FNZ Studio Composition, and this is done through Permissions, which allow regulating the access of each Role to different areas.
If you have an Administrator Role, you can assign Permissions to other Roles by following these steps:
-
Right-click on the Role name and select the Permissions button.
-
The Permissions dialog is displayed. For each Role, select the desired level of Permission:
-
Full Access - The user with the current Role can perform all the listed actions in that submodule.
-
Read-Only Access - The user with the current Role can view the submodule but cannot perform any actions in that area.
A Role with Full Access on a certain Permission can also perform all the actions included at Read-Only Access level. -
No Access - The user with the current Role cannot view the related submodule nor perform any action in that area.
-
-
After closing the dialog, the available Permissions and the corresponding levels (FA, RO, NA) for each Role are also displayed in the Permissions column.
Permissions are managed through the Advanced Studio Permission feature. Refer to the Advanced Studio Permission document for full information.
Role Synchronization Based on HTTP Requests
Finally, consider the role played by the configuration property nm.auth.roles.mapped. This property automatically updates the Role membership of a User based on information received in HTTP requests.
Through this property, the Platform selects the list of Roles to match against the security roles contained in HTTP requests. Instead of looping over all Roles available in the Platform (this was a default behavior in former Appway versions), only the Roles listed in this configuration property are looped over.
This means that, by adding all security-related Roles such as Administrator or User to this property, you can guarantee that such Roles get synchronized automatically (and re-created in case they are deleted by mistake). At the same time, by not adding Solution-specific Roles to this property, you avoid that Users are removed from such Solution-specific Roles due to this automatic sync.